Developing with the Managed SDK
This section will cover the different parts that are necessary to create and run a project using the OpenRoads Managed SDK. An example of a managed project can be found within the SDK installation under examples > ManagedSDKExample.
This example is written as a C# project in Visual Studio. To open the ManagedSDKExample project in Visual Studio, run the openSln.bat file from within the developer shell. This file is found within the ManagedSDKExample directory. Now the project will be opened with the necessary environment so that it can also be compiled (and debugged) within Visual Studio.
First, note that a Key-In is just a type of add-in. This means that projects using the SDK are created as Add-Ins which are then mapped to Key-In commands. There are a few files that need to be set up to create the Add-In and map it to commands.
1. CommandTable.xml
This XML file creates the hierarchy of commands for the
Key-In. For example, the screenshot below shows three levels of a Key-In
hierarchy for the mirror command.
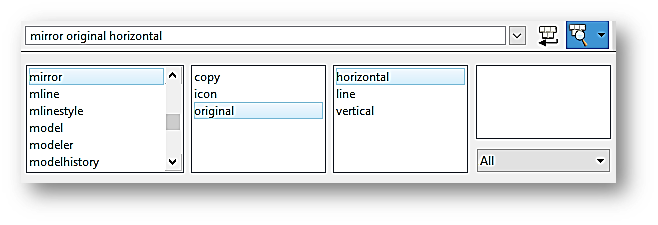
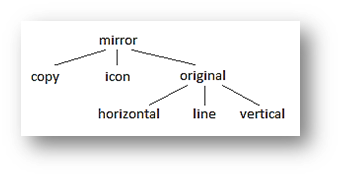
In this case, the hierarchy of commands is as follows:
Look at the CommandTable.xml file within the ManagedSDKExample project. This project only has two levels of commands. The top-most level is the managedsdkexample command, created here:

The RootKeyinTable element sets up the main Key-In command. From here, there are SubKeyinTable elements that create the levels of commands within the Key-In hierarchy. In this case, there is a REPORT command that has its own KeyInTable for sub-commands.


This KeyinTable for REPORT (mapped to the parent command using the ID ReportCmd) sets up the next level of the command hierarchy. There can be multiple commands on each level, and each command can have its own sub-commands as well. In this case, the HORIZONTALALIGNMENTS command also has sub-commands.
After defining the commands and sub-commands for the Key-Ins, the next element is the KeyinHandlers element. This maps the specific Key-Ins to C# functions.
Look at the KeyinHandler for the horizontal alignment report command:

This element maps the KeyIn managedsdkexample report horizontalalignments to the CmdHorizontalAlignmentReport() function. This function is stored in the KeyIn class. All commands are mapped to corresponding functions this way.
Note:
For the command table to work, its Logical Name must be set to CommandTable.xml. This is done in the code for the project file, which is discussed later.
2. Keyin.cs
This file maps commands in the CommandTable.xml file with functions in the main add-in class (in the case of this example, the ManagedSDKExample class). For the horizontal alignment report command, the CmdHorizontalAlignmentReport() function is defined in the KeyIn class as follows:

This function maps to the HorizontalAlignmentReport () function in the ManagedSDKExample class.
3. Addin class(ManagedSDKExample.cs)
A managed project needs to have a class which inherits from the Bentley.MstnPlatformNET.Addin class. For the example, this class is the ManagedSDKExample class in the ManagedSDKExample.cs file. The Add-In also needs an MdlTaskID. Both steps are done as follows:
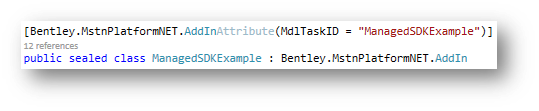
Here, the MdlTaskID is set to "ManagedSDKExample" the class inheritance is set up. The Addin class requires a few functions to be implemented.
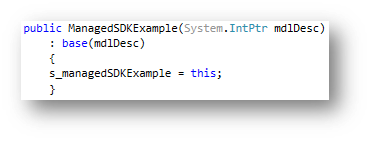
Constructor
Run
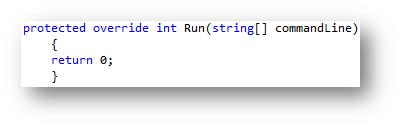
Instance
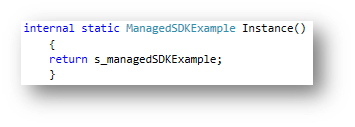
Note that the Constructor and Instance functions use the s_managedSDKExample variable. This is a static variable used to create instances of ManagedSDKExample which the Keyin class uses for mapping. It's declared at the top of the ManagedSDKExample class:

This variable and these functions create the framework for an Addin class. The rest of the functionality uses the Managed SDK to read data from the active DGN file, and serves as a good starting point for learning how to interface and interact with OpenRoads Designer.
4. Customized Project File
For a project to correctly compile and work with OpenRoads Designer, the project file needs to be edited (in the case of the example, this is the ManagedSDKExample.csproj file). This can be done by opening the file in another text editor, or in Visual Studio after unloading the project. To edit it in Visual Studio, right-click on the project in Solution Explorer and click Unload Project. Then right-click on the project again and select "Edit [ProjectName].csproj." This should open the project file as XML.
There are a few parts of the project file that need to be edited.
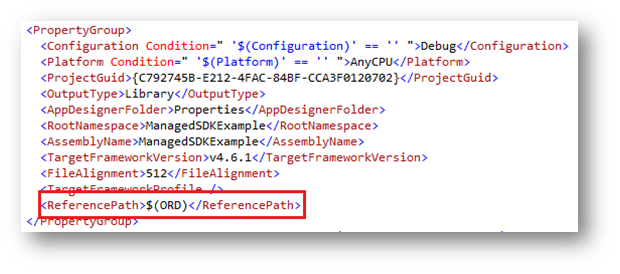
- Set the ReferencePath to $(ORD)
- Set the Release and Debug OutputPath to $(ORD)\mdlapps

- Set the LogicalName of the command table to CommandTable.xml

- (Optional) Make referenced assemblies relative to $(ORD) directory
To guarantee this project can be opened and debugged by other users, replace the directory of the OpenRoadsDesigner installation with the $(ORD) variable like below.

Debugging a Managed Project
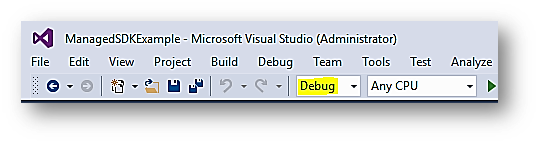
- A managed project can be debugged through Visual Studio. Open the project using the openSln.bat file and use Visual Studio to build it in debug mode
- The ManagedSDKExample.csproj file is set up to output these build objects directly into the OpenRoadsDesigner installation (see Step 2 of editing the C# project file above). Because of this, the project can be debugged by attaching to a running instance of OpenRoads Designer.
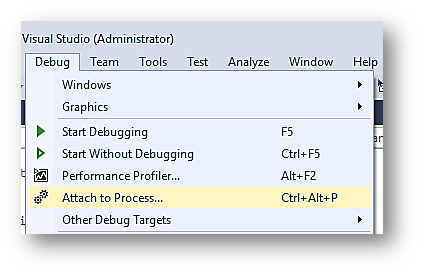
- To do this, first launch OpenRoads Designer normally. Once loaded, go to Visual Studio and select
Debug > Attach to Process.
- This will open the Attach to Process dialog. From here, make sure to set the Attach to: value to Managed (v4.6, v4.5, v4.0) Code.

- Locate "OpenRoadsDesigner.exe" in the list of available processes, select it, and click Attach. Once Visual Studio has loaded the symbols for the application, it will say Ready in the status bar at the bottom of the screen.
- Placing a breakpoint in any of the .cs files in the project will show the error "No symbols have been loaded for this document." For these to work, return to OpenRoads Designer and use mdl load to load the managed Add-In. Doing this will cause Visual Studio to load the required symbols and the breakpoints will work properly. The project can now be debugged.